Monday, December 31, 2012

I'm Smitten! January Stamp of the Month Blog Hop

Happy New Year and welcome to the January stamp of the month blog hop!  If you have arrived here from Michelle Jones' blog, or if you are just starting out, you are in the right place.  When you're done here, you'll visit Dawn Ross next.

This month we are featuring Happy Valentine's, a beautiful set of 7 stamps.  But don't be fooled by the name, the sentiments in this set are also perfect for weddings, anniversaries, and more.  And the roses are great for any occasion. I chose to make a valentine for my hubby.


I cut this 6x6 card using my Cricut and the Art Philosophy cartridge.  Using the "center point" feature allowed me to position the opening in both the card base and the mat. (The pattern paper is from the Pear & Partridge paper pack.)


The image seen through the opening is on the inner mat. The images and the ribbon are colored with the CTMH Exclusive Inks alcohol markers. I colored a blue background around the roses, but left the majority of the mat white for my stamped sentiment and room to write.

All of the products used to make this card are available from Close To My Heart:
I hope you enjoyed my project today and I'd love to hear your comments!  Don't forget to hop along to Dawn Ross' blog - I'm sure she has a fabulous project for us too.

Wednesday, December 19, 2012

Easy Gift Bags With Scor Pal

It's my turn again today at the Cutters Creek blog!  I decided on this fun & easy project that's great for any time of year.

With Christmas rapidly approaching and teacher gifts finally completed, I realized I needed some gift bags to pop them in.  Scor Pal to the rescue!  You can use your Scor Pal to make nearly any size bag you want, and I can show you how.

Based on the size of my gift, I decided to make a bag 6" wide by 2.5" deep. (Sorry, I can't show the actual gifts yet, since they are being given Thursday & Friday and I don't want to spoil the surprise, just in case!)  So, it's easy to figure out how much paper you need based on the size of the bag, plus a 1/2" - 1" flap for adhering.  Just add up all of the sides: 6 + 2.5 + 6 + 2.5 = 17.  Since this is larger than 12 inches, I know I will need 2 sheets of cardstock.  I will need a flap on each piece to attach them, and I choose a 1/2" flap, so I will need 2 sheets cut to 9" x 12". The 12" is height plus bottom, so lay your cardstock on the Scor Pal vertically, like this:


Next, score the cardstock for the 2 side measurements and flap.


When you have scored both lines, your cardstock should look like this:


Next, you will rotate your cardstock one turn (90 degrees). It doesn't matter which way you turn it, as long as you do both sheets of cardstock the same way.  When you are done, the cardstock will look like this:


This corner piece I have scribbled through gets removed completely.

Next, you will cut the flaps for the bottom of the bag:


The arrows I drew in show where pieces are cut to make the flaps.  Note that the piece we cut completely out in the previous step is next to a bottom flap.  Next, we need to attach the two pieces of cardstock and assemble the bottom of the bag.


Lay your cardstock so the fold of the skinny side flap is a "mountain" fold.  Put your adhesive on the top side of this skinny flap on both pieces of cardstock.  Now adhere the flap on the first piece of cardstock to the "inside" of the second piece of cardstock.  Then adhere the flap on the second piece of cardstock to the inside of the first piece of cardstock.


Next you will put adhesive on the "outside" of the smaller side flaps, and fold over one of the larger side flaps on top of them.  Set it flat on the table and push down the smaller flaps from the inside of the bag to make sure they are adhered.


Finally, you will put adhesive on the "inside" of the final flap and adhere it to the rest of the bottom.  Your bag is now finished.  If you are going to want to put a topper on your bag, you can use your fingers to crease the small sides in half partway down the sides of the bag.

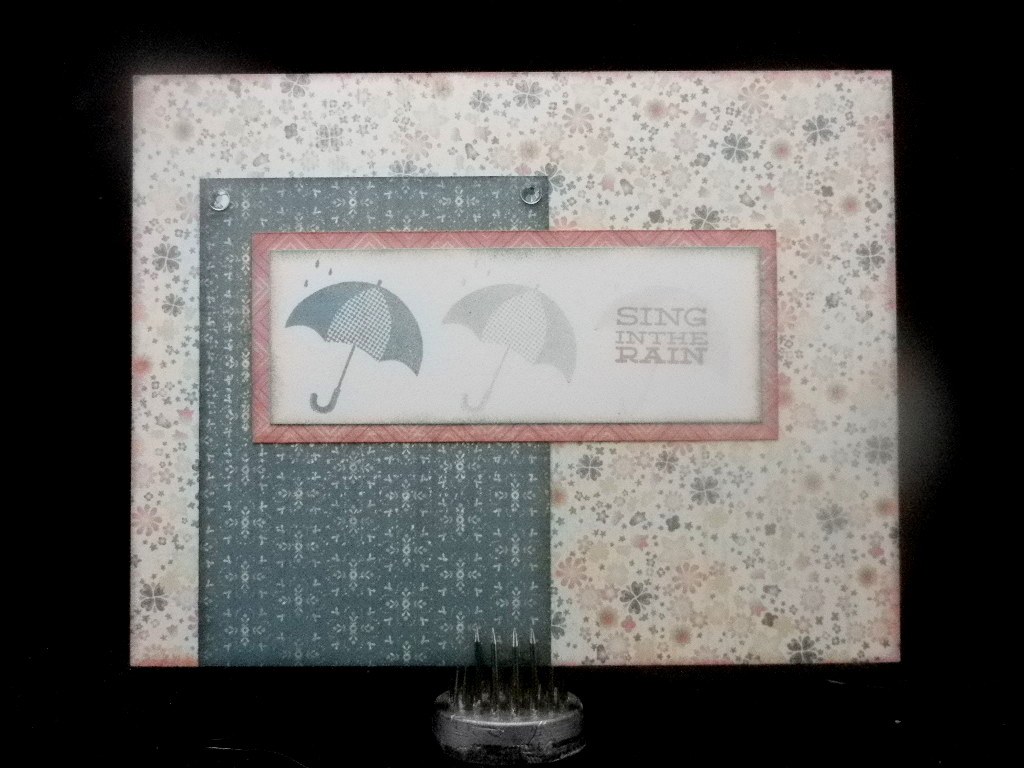
Now, on to the fun part - making the bag pretty!  Here is how mine turned out:


I opted for a simple topper since my paper had a pretty design.  The 6"x6" paper pads in the store are perfect for this! I just folded mine in half.  I wanted to make my bag reusable, so rather than permanently attach the topper, I wanted to tie it on.  I held my folded topper over the folded bag and punched 2 holes through all of the layers at once.  I used eyelets from my stash to reinforce the holes in the topper only.


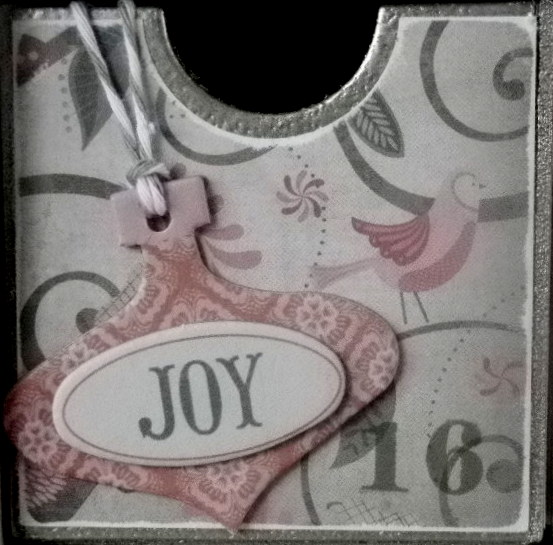
Since my paper had a pretty design, I left it alone and just traced over some of the design elements with my Copic Spica pens.


I also traced over some of the stamped elements on this tag with the Copic Spics pens.  I reinforced the hole in the tag with another eyelet.  I threaded twine through the holes in the bag & topper, then through the tag and tied it in a shoestring bow.  Easy to open and easy to reuse!

The following products to make this are available in the Cutters Creek store:
Other materials used:
  • cardstock in coordinating color(s)
  • Cricut Artiste cartridge (for tag)
  • stamps of your choice (for tag)
  • eyelets and punch (I used a Crop-a-dile)

Tuesday, December 11, 2012

Christmas Days With Creations By AR - Day 6


Hello and welcome to Day 6 of Christmas Days!  From December 6 to 15, the Creations by AR Design Team will be sharing ideas for presenting holiday gifts using templates from Creations by AR!  Everyday for ten days, our designers will bring inspiration to you with our holiday projects. Join us daily at our FaceBook Page or at our group on Paper Craft Planet.

DAILY PRIZE GIVEAWAY: One winner each day will receive one template of their choice. The Daily Prize winner will be chosen from comments left on the designer's blog. Winners to be announced the following day on the AR FaceBook Page and AR Group on PCP.

GRAND PRIZE WINNER: One random winner will be chosen to receive ONE TEMPLATE A MONTH FOR SIX MONTHS beginning January 2013! The Grand Prize Winner will be randomly chosen from comments left on the AR FaceBook Page and AR Group on PCP.  Winner to be announced December 16.

Thanks for stopping by to see my project today!  Tomorrow's stop will be hosted by Amy at http://tethered2home.com/ - and I can't wait to see her project! But first, let's check out what I made for today:


I chose to use this versatile 3-Pocket Caddy.  Imported at actual size into Make The Cut, it's the perfect size for all kinds of little gift sets. This example is stocked with some great little bits for mani-pedis: perfect for both the tweens in my house, AND for that friend who loves to change her nails as often as her clothes!


Here it is again, stocked with dark hot chocolate, chocolate tea, and milk chocolate sea salt caramels. It would also be great to tote a gift for that special little person in your life; what could be better than a couple of special sugar cookies in each outer pocket and mini tubes of frosting in the center for decorating?!  What about travel sizes of some awesome spa products for a friend who travels a lot for work?  Assorted packages of embellishments or jewelry parts for a crafty friend?  The possibilities are pretty much endless!


A couple of great hints for using this template: I used two sheets of the same double-sided pattern cardstock so the parts flow together seamlessly.  Also, I used the "waste" part from the handle cutout as a tag here.  I layered it onto a rosette made from coordinating cardstock which I nudged into an oval shape when I adhered it.


It's easy to add a simple decoration to the handle area.  If you don't want even the amount of work I went to, it's super easy to just tie a bow through the handle with coordinating ribbon.

Here's a list of the products I used with the template to make this super cute box:
  • Pear & Partridge paper pack, CTMH
  • Versamark stamp pad
  • Red embossing powder
  • A Holiday stamp set, (discontinued, CTMH - holly leaves)
  • Cranberry and New England Ivy stamp pads, CTMH
  • Sparkles red, pink, & purple assortment, CTMH
  • Scor Tape
  • Foam adhesive tape
  • Liquid Glass, CTMH (to adhere rosette to sentiment tag and box)

Friday, November 30, 2012

A Year Full Of Cards - December SOTM Blog Hop

Hello, and welcome to the December Stamp Of the Month blog hop!  If you have arrived here from Teresa Scrivens' blog, or if you are just starting out, you are in the right place!  When you are done here, you'll hop along to Carla Ironside's blog and see what she has to share with us.

This month's stamp set is Year Round Cheer, a fun set of 12 stamps perfect for every month of the year!  I chose to cut each of my stamps into two stamps, so I can easily stamp the image portion in one color/location, and the sentiment portion in another color/location.  I enjoyed these stamps so much, I couldn't make just one project; I made TWELVE!

Since making twelve cards delayed me a bit (and I have to leave for work in a few minutes), I'm just going to show you the pictures and I'll add the full details later tonight.  Stop back by if you want to know exactly what I used for a certain card.  I would like to point out that each card uses a different stamp from the set AND a different sketch pattern from Make It from Your Heart Volume 1, an awesome book full of patterns and ideas for both scrapbooks and cards.

Now, here they are:


I think a set of cards like this would make a great last-minute gift, and you can probably make most of them with scraps and a package of our cards & envelopes!  Now, don't forget to head over to Carla Ironside's blog!

Tuesday, November 27, 2012

Down On the Farm Card

I know, everyone seems to be Christmas crafting lately.  But life goes on, and I needed a break from Christmas anyway!  I grew up on a farm, and I am still a country girl at heart even though I married a suburbanite and my own kids would have no idea how to deal with the chickens (not that I enjoyed that job much, myself).  I love this Country Girl stamp by Sarah Kay, so I felt the need to color her for my latest project for Cutters Creek.


I matched her up to some great papers from the Miss Caroline Dilly Dally 6"x6" paper pad from My Mind's Eye.  The frame is cut with my Cricut using the Fancy Frames cartridge.  I added a felt ribbon, paper flowers, buttons, & a brad from my stash to complete my card. I sure hope my recipient likes it!


She was a lot of fun to color with my Copic markers.  Here is a list of the colors I used:
  • R29, R39
  • Y11, Y13, Y15, Y21
  • YR000
  • BG11, BG15, BG18
  • B000
  • E00, E02, E11, E13, E15, E37
  • C1
  • W1, W3, W5
These items are all available at Cutters Creek:
Thanks for stopping by today!  I hope you enjoyed this project.

Monday, November 26, 2012

Complete! Advent Calendar Success

As I suspected, once I finally got the wood base assembled for this Kaisercraft advent calendar, it turned out beautifully!  And I hope the wood construction means that it will last for years.


I left my base plain as it came since it matched my papers, but you could easily paint it. The drawers are large enough to hold a small treat for each of my (three) kids, and I plan to put slips of paper inside some with an activity for that day (great for weekends!).


Because the joinery shows when assembled, I covered the top and sides.  I chose an allover small print because it's larger than 12" and needs to be pieced.  I used a zip strip from one of my papers along the center of the top, but it would look fine plain also.


I chose to cover the front and sides of each box with a variety of the papers & cardstocks in the Pear & Partidge paper pack.  I distressed all of the edges using the distressing tool that looks a bit like an emery board.  I also inked and gold embossed all of the edges & corners of the base boxes for bling.


I decorated the box fronts with an assortment of embellishments and the November stamp of the month set, Capture The Date.  I like that is has several sizes/styles of numbers so I could use different ones depending on how much room I had. (Sorry, the red velvet rub-ons I used are no longer available, except as part of Hostess Collection 4, while supplies last.)


This box is the easiest possible! I just used one of the Dimensional Elements In Color and stamped a "3" on it. Super quick!


This one uses a couple of rub-ons for the leaves; all of the other items are from the Antiqued Gold Mini-Medley Accents Collection.


This is another from the Pear & Partridge Glittery Rub-Ons.  I added a little extra glitter with some Pink Glitz glitter gel on the berries. These are super easy to put on using the Rub-On Tool.


This is another of the Dimensional Elements In Color.  I punched a hole in the top of the ornament and added some twine for a hanger.  I adhered the twine to the inside of the box using some Liquid Glass.


Finally, this set of three uses one larger rub-on. They can easily be cut apart and applied across multiple items.  Or, the rub-ons can also be layered on top of each other for dimension, like a bird overlapping part of a snowflake.

I hope you enjoyed this fun project! I would love to hear your comments on it. If you're inspired to make one of your own, here is a list of products I used:

* All starred items are available as part of Hostess Collection 4

Saturday, November 24, 2012

Advent Calendar and Shop Small Specials

Today I wanted to share a sneak peek of an Advent Calendar I've been working on, and I also realized I didn't post my Small Business Saturday specials here yet.  First, a quick rundown of my specials:
  • Any order placed this month will receive a free gift from me, a fun & versatile embellishment kit.
  • Shop online and join my Shop Small gathering - any order of at least $35 will receive from me a free Monogram stamp of your choice.
  • Any order placed for Small Business Saturday will be entered into a drawing for another surprise free gift. (Extended through MONDAY since I forgot to post earlier!)
Now, on to the Advent Calendar, and a bit of a product review.  This is my drawer for December 1.
(I think I need some kind of template for making those swirls, lol.  I never like how mine turn out!)

I received my Kaisercraft Mini Treasure Chest quite some time ago, but I am just now getting around to using it.  I must say that  if I had known that CTMH would be coming out with the MyCreations Cubby this catalog, I would have waited. I have had a lot of trouble assembling the Kaisercraft chest and getting it to stay together - I think I am going to have to ask hubby for the wood glue and clamps as nothing else stays put for long.  Also, since the drawers are bare chipboard, they require a lot of "finishing".  I know when it is finished it will look nice and hopefully be used for many years, but it has been a hassle for something so pricey ($29.99).

I have not ordered the CTMH MyCreations Cubby myself yet, but at $16.95 I will try it soon. (I think it will make a neat "25 things I love about you" display.)  This one includes only the base, and the boxes are cut using the Artiste Cricut cartridge.  If I leave the base blank, I could even make different themed boxes and switch them out...

I will be posting the entire Advent Calendar as I get it finished up.  So far, I have used the Pear & Partridge paper pack and rubons, a sanding kit, Almond Glitz glitter gel, and the November stamp of the month Capture the Date.

Thursday, November 15, 2012

A Christmas House - Creations by AR Blog Hop

Hello and welcome to the Home For the Holidays new release blog hop with the Creations by AR Design Team!  If this is your first time joining us, here are the details:

3 LUCKY WINNERS! 
How to Win: One random comment from each group listed below will be chosen to receive the new template. The more you comment, the greater your chances! (Ends Sunday at midnight EST)

Visit and comment at each blog - one winner chosen from the AR Team

One winner chosen from a comment on the AR Facebook Page.

The third winner will be chosen from the comments left on PCP.
 The new template for this release is this cute House Box and Ornament.  It can also be an ornament just by stringing the whole house on a string or ribbon.  Here's my sweet & simple version:


And here it is again in better lighting:
I added the window frames to mine, but otherwise kept it simple. I used some coordinated products from Close To My Heart: Pear & Partridge paper pack & rubons, twine, and Glitz glitter gel. I also used Liquid Glass for my adhesive - it can be moved a bit then dries quickly and has a strong hold.

I love that this can be used as both an ornament and a gift box.  And they are simple enough to make that you can create a whole tree full in a short time! Now, be sure to visit the other DT members' blogs and check out their versions.

Monday, November 5, 2012

Twice the Gifts In Half the Time!

Do you love to share your photos with family at the holidays?  Do you struggle with the amount of time it takes to make gifts with those photos?  If so, then Studio J could be the answer! 

For my day-to-day scrapbooking, I am a hands-on kind of girl; digital is not really my thing.  However, after trying out the new Express Collections, I know that these are perfect for holiday gifts!  Need duplicate albums for grandparents, siblings, etc.?  Do the work just once and have multiple prints made!  And the Express Collections make it faster than ever before (which was a big hurdle to digital for me).  Choose the entire Collection of 11 2-page layouts (including intro and end pages) for a theme album, or choose just the layouts you want.  There's even a great "Year in Review" collection, which I think would be great for grandparent gifts!

Oh, and did I mention that the software is completely free? You have to create an account before you start, but there is no obligation - you don't pay for anything unless you decide to purchase your project.  Let me show you the 5 layouts I recently completed. (I think it took me about 3.5 hours for all 5; not bad for my first time!)


This layout is direct from the School Days collection.  I just dropped in my photos, addte "first day of" to the title, and added my journaling details.  It was super fast, and it was easy to crop my pictures in place.


This layout is from the Year in Review collection.  I dropped in my photos, changed the duplicates to black & white, added my journaling details, and changed the "this year in" to "first day of" in the title.  I love that even though I had fewer pictures than the layout called for, it's easy to use it anyway.  The filmstrip-style row of pictures gave me the idea to duplicate a single picture on each side and only leave the one on the end in color.  The software makes it easy to switch to black & white by just clicking a box.


This one started with a Custom Layout.  That means that I first chose the paper pack I wanted to use, then found the layout pattern.  This is the Avonlea paper pack and the Backstage pattern.  This particular layout was for a class for the CTMH Regional Celebration that I attended, so they had specific directions for us to follow for many of the steps.   You can change the color and/or intensity of any paper in the layout, add embellishments, change colors of things like fonts and buttons, and more.  Feel free to play around and change anything and everything. You can always undo anything you don't like.


This layout began with the True Friend paper pack and the Honeycomb pattern.  What do I love?  This is one of many paper pack available only on Studio J, including many of those paper packs that used to be available in "real" paper that have been discontinued.  I also love the trendy hexagon shapes on this pattern - lots of fun, and you pick the exact paper patterns you want to use!

Finally, this layout uses the Class Act paper pack and the Glimpses pattern.  I based my colors and patterns on my daughter's clothes (and her favorite color).  So I used the Kit Mix 3 and change the multicolor numbers paper to Twilight and the white background to Twilight.  I added heavy black distressing to define the edges and add interest.  I also changed colors on the embellishments.

I love how fast these all were to make - I really think it would have taken me a lot less time except that I just couldn't resist playing around with everything to see what the different changes would do!

I invite you to go create an account and try out Studio J - I think you'll be hooked too!
Related Posts Plugin for WordPress, Blogger...